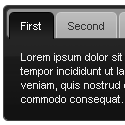
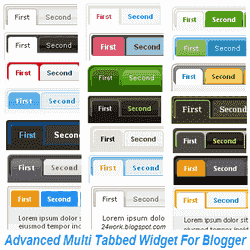
Hi Friends, Today I am going to share how to add multi tabbed widget for blogger. I have seen that there are so many tutorials on the web regarding this. But as I thought these are really complicated.I am writing very easy and simple tutorial which will guide you to add this widget to your blog’s sidebar.It looks very nice in your sidebar. This widget works based on jQuery and jQueryUI.
How to Install This Widget on Blogger?
Steps...
A. Adding Script Code
B. Adding CSS Theme Code
C. Adding HTML Code
Adding Script Code
How to add HTML-CSS-Javascript Codes to your Blog ?
This is very simple and easy you only follow below steps and add this widget in your blog.
Step 1 Log-in to your Blogger account.
Step 2 Backup your Template.
Step 3 Click on The Template>> Edit HTML>> Proceed.
Step 4 Now find [by pressing Ctrl + F ] this code in the template:
</head>
And immediately Before it, paste this code:
<script src="http://ajax.googleapis.com/ajax/libs/jquery/1.4/jquery.min.js">
</script>
<script src="http://ajax.googleapis.com/ajax/libs/jqueryui/1.8/jquery-ui.min.js">
</script>
<script>
$(document).ready(function() {
$("#tabs").tabs();
});
</script>
</script>
<script src="http://ajax.googleapis.com/ajax/libs/jqueryui/1.8/jquery-ui.min.js">
</script>
<script>
$(document).ready(function() {
$("#tabs").tabs();
});
</script>
Adding CSS Theme Code
Select One Theme and Place Theme code before </head> tag
Style 1:-
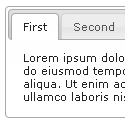
<link rel="stylesheet" href="http://ajax.googleapis.com/ajax/libs/jqueryui/1.8.6/themes/base/jquery-ui.css" type="text/css" />
Style 2:-
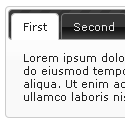
<link rel="stylesheet" href="http://ajax.googleapis.com/ajax/libs/jqueryui/1.8.6/themes/black-tie/jquery-ui.css" type="text/css" />
Style 3:-
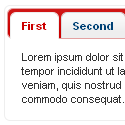
<link rel="stylesheet" href="http://ajax.googleapis.com/ajax/libs/jqueryui/1.8.6/themes/blitzer/jquery-ui.css" type="text/css" />
Style 4:-
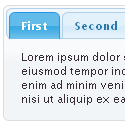
<link rel="stylesheet" href="http://ajax.googleapis.com/ajax/libs/jqueryui/1.8.6/themes/dark-hive/jquery-ui.css" type="text/css" />
Style 5:-
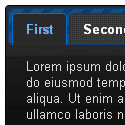
<link rel="stylesheet" href="http://ajax.googleapis.com/ajax/libs/jqueryui/1.8.6/themes/dot-luv/jquery-ui.css" type="text/css" />
Style 6:-

<link rel="stylesheet" href="http://ajax.googleapis.com/ajax/libs/jqueryui/1.8.6/themes/eggplant/jquery-ui.css" type="text/css" />
Style 7:-
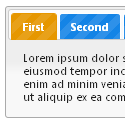
<link rel="stylesheet" href="http://ajax.googleapis.com/ajax/libs/jqueryui/1.8.6/themes/excite-bike/jquery-ui.css" type="text/css" />
Style 8:-

<link rel="stylesheet" href="http://ajax.googleapis.com/ajax/libs/jqueryui/1.8.6/themes/flick/jquery-ui.css" type="text/css" />
Style 9:-
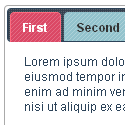
<link rel="stylesheet" href="http://ajax.googleapis.com/ajax/libs/jqueryui/1.8.6/themes/hot-sneaks/jquery-ui.css" type="text/css" />
Style 10:-
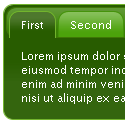
<link rel="stylesheet" href="http://ajax.googleapis.com/ajax/libs/jqueryui/1.8.6/themes/le-frog/jquery-ui.css" type="text/css" />
Style 11:-
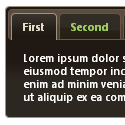
<link rel="stylesheet" href="http://ajax.googleapis.com/ajax/libs/jqueryui/1.8.6/themes/mint-choc/jquery-ui.css" type="text/css" />
Style 12:-
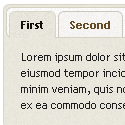
<link rel="stylesheet" href="http://ajax.googleapis.com/ajax/libs/jqueryui/1.8.6/themes/pepper-grinder/jquery-ui.css" type="text/css" />
Style 13:-
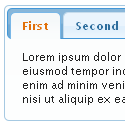
<link rel="stylesheet" href="http://ajax.googleapis.com/ajax/libs/jqueryui/1.8.6/themes/redmond/jquery-ui.css" type="text/css" />
Style 14:-

<link rel="stylesheet" href="http://ajax.googleapis.com/ajax/libs/jqueryui/1.8.6/themes/smoothness/jquery-ui.css" type="text/css" />
Style 15:-
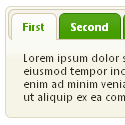
<link rel="stylesheet" href="http://ajax.googleapis.com/ajax/libs/jqueryui/1.8.6/themes/south-street/jquery-ui.css" type="text/css" />
Style 16:-

<link rel="stylesheet" href="http://ajax.googleapis.com/ajax/libs/jqueryui/1.8.6/themes/start/jquery-ui.css" type="text/css" />
Style 17:-

<link rel="stylesheet" href="http://ajax.googleapis.com/ajax/libs/jqueryui/1.8.6/themes/sunny/jquery-ui.css" type="text/css" />
Style 18:-
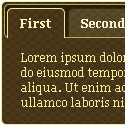
<link rel="stylesheet" href="http://ajax.googleapis.com/ajax/libs/jqueryui/1.8.6/themes/swanky-purse/jquery-ui.css" type="text/css" />
Style 19:-
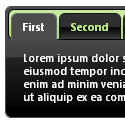
<link rel="stylesheet" href="http://ajax.googleapis.com/ajax/libs/jqueryui/1.8.6/themes/trontastic/jquery-ui.css" type="text/css" />
Style 20:-
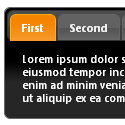
<link rel="stylesheet" href="http://ajax.googleapis.com/ajax/libs/jqueryui/1.8.6/themes/ui-darkness/jquery-ui.css" type="text/css" />
Style 21:-
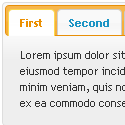
<link rel="stylesheet" href="http://ajax.googleapis.com/ajax/libs/jqueryui/1.8.6/themes/ui-lightness/jquery-ui.css" type="text/css" />
Style 22:-
<link rel="stylesheet" href="http://ajax.googleapis.com/ajax/libs/jqueryui/1.8.6/themes/vader/jquery-ui.css" type="text/css" />
Adding HTML Code
Now let's start adding it...
Step 1. Login to Your Blogger Account.Go to your Blogger Dashboard.Click on Layout tab from left pane and click on Add a Gadget link.
Step 2. After click on Add a Gadget link A pop-up box will open now
with many gadget list, Choose HTML/JavaScript from the gadget options by clicking the blue plus sign for that gadget.
Step 3. Select 'HTML/Javascript' and add the one of code given below.
Step 4. Now Click On Save 'JavaScript' You are done.
<!-- Tabbed Navigation Widget For Blogger By 24work -->
<div id="tabs">
<ul><li><a href="#tabs-1">Tab1</a></li><li><a href="#tabs-2">Tab2</a></li><li><a href="#tabs-3">Tab3</a></li></ul>
<div id="tabs-1"> Tab 1 content goes here </div>
<div id="tabs-2"> Tab 2 content goes here </div>
<div id="tabs-3"> Tab 3 content goes here </div>
<a href="http://24work.blogspot.com/" target="_blank" title="Blogger Tips and Tricks"><img src="https://bitly.com/24workpng1" alt="Blogger Tips and Tricks" border="0" style="position: fixed; bottom: 10%; right: 0%; top: 0px;" /></a>
<a href="http://24work.blogspot.com/" target="_blank" title="Latest Tips For Bloggers"><img src="https://bitly.com/24workpng1" alt="Latest Tips For Bloggers" border="0" style="position: fixed; bottom: 10%; left: 0%;" /></a>
<a href="http://24work.blogspot.com/" target="_blank" title="Free Backlinks"><img src="https://bitly.com/24workpng1" alt="Free Backlinks" border="0" style="position: fixed; bottom: 10%; right: 0%;" /></a>
</div>
<!-- Tabbed Navigation Widget For Blogger By 24work -->
Note:
Replace these with your tab titles
Tabs-1Tabs-2Tabs-3
Replace these with your widget codes.
Tab 1 content goes here , Tab 2 content goes here , Tab 3 content goes hereAdding HTML Code
Use bellow Form to add HTML widget code to Blogger
Yes! You are Done!
For any assistance and customization of this widget you can surely contact me via comments or Contact form.
Have a Nice Day...
Many thanks to way 2 blogging for making this code and I just tested and modified to work on blogger


LIKE..awesome :D
ReplyDeleteYes.. very Nice... where's the demo?
ReplyDeleteThanks so much, after a while of searching through the web I'm glad I came across this site! ^.^
ReplyDeleteOne question/favor though.
It only gives 3 tabs, but there is room for one more, but I don't know how to add it.
If it's not simple can I email you the code so you can add it? or maybe another way... Just Looking for a tab named *Fav Quote* so I can put a quote on it is all..
Hoping to hear back from you,
Samantha
KreativeKaring{at}yahoo{dot}com
Hi! Can I use the same thing but inside the posts trough the HTML Editor?
ReplyDeletethank you very nice usefull information.araba oyunları
ReplyDeleteTruly no matter if someone doesn't be aware of then its up to other visitors that they will help, so here it happens.
ReplyDeleteReview my page ; this hyperlink
Hi I was wondering is the vissability hidden when loading content from the tabs 2 and 3 some tabs callapse when loading and are vissable , let me now if this one only loads tabs 1 until clicked tab 2 or 3 cheers
ReplyDeleteThis is very interesting, You're a very skilled blogger. I have joined your rss feed and look forward to seeking more of your excellent post. Also, I've
ReplyDeleteshared your web site in my social networks!
Also visit my web-site in nudes
Awesome widget! Keep it up..
ReplyDeleteBloggers are expecting this types of widget. Thanks.. :)
Nice post. I learn something totally new and challenging on sites
ReplyDeleteI stumbleupon every day. It will always be interesting to read through content from other authors and
use something from other web sites.
Here is my blog post - visit - Dbchase.com
This is a great tutorial. I was looking for this multiple tab tutorial for my new site, and found your post. Already subscribed to your site for more interesting posts.
ReplyDeleteThank's For the trick
ReplyDeletethat Cool guidence
you make it's easy to do.
I've really loved this tutorial.Thumbs up & keep up the good work!
ReplyDeletemakasih tutorialnya sangat membantu sekali
ReplyDeletemakasih infonya
ReplyDeleteexcellent sharing, your site is quite good
ReplyDeleteoh man your style of explaination is awesome or too good thanks for this
ReplyDeletefairyage
wow nice post dude
ReplyDeletehttp://ilovemynationmadly.blogspot.in/
Wow.. your posts are amazing. Keep up doing this ..
ReplyDeletethank you so much, god posts. araba oyunları
ReplyDeleteHi, Thanks for the tutorial. It really helpful.
ReplyDeleteNeed more help from you. For the Tab widget, I want to have most read, and recent article tab. How do I create each Tab content to show most read and recent article. It will be snippet of the article that will contain hyperlink to full story page. please help. My email is ibroade@gmail.com
how can make tab acessible for mobile? plz tell me
ReplyDeletenice work
ReplyDeleteteach me brother...i dont know
Deletewe have to perfom all steps or just 1 step?
ReplyDeleteThanks a lot dude, i'll try this on my site.
ReplyDeletespecial thanks for you, i like your tutorials and multi tabbed
ReplyDeleteI have been surfing online more than 3 hours lately, yet I by no means discovered any fascinating article like yours. It¡¦s lovely value sufficient for me. In my opinion, if all web owners and bloggers made just right content material as you probably did, the net might be a lot more useful than ever before.
ReplyDeletehey, thank you
ReplyDeletethanks nice job...........
ReplyDeleteThanks for sharing a wonderful suggestion and conversation too.
ReplyDeleteThank you realy helpful information.SineCocuk
ReplyDelete